Pages

Featured Post

Review: Origins Haul

The Origins counter at Boots really excited me when I asked the lady at the counter if its natural and she replied yes. So I bought a few...

Tuesday, 30 September 2014

Review: Origins Haul


The Origins counter at Boots really excited me when I asked the lady at the counter if its natural and she replied yes. So I bought a few products although the colour matches were not the best. It is a fairly natural make-up brand but not 100%. I say fairly, as they do not use many of the most popular and well known nasties like parabens and phthalates, but they still use ingredients like BHTmethylparaben's (in some) and lemonene.

Im NC44 in foundation colour, and can get away with NC42 for concealer for under eye highlighting in Mac terminology and there is no perfect colour match in the Origins range for my skin colour especially for my yellow tones. I also have Oily acneic skin but have suggested my views based on my mums mature normal skin and my sisters combination skin type.
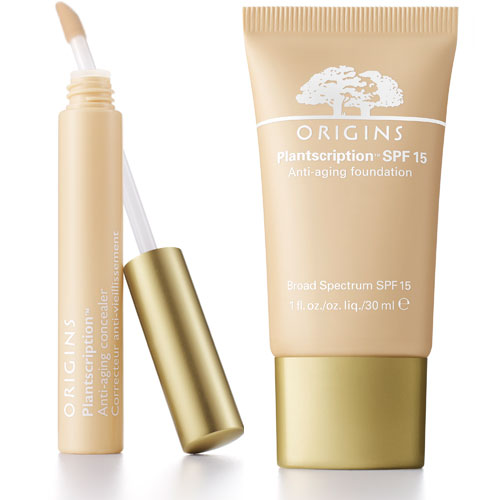


Origins Plantscription Anti-aging concealer- colour 04 Medium/Deep

The concealer mentioned above has a neutral pinky tone. If you have a neutral tone then it may work for you but definitely not for the more yellow tones. It feels luxurious but it glides to a sheer finish so it does not cover enough but its perfect for those wanting a sheer glossy finish. It doesn't look cakey and it would look flawless on mature skin however on skin that is prone to oil may find it to go in the under eye lines so setting it would be ideal. It gives a highlighted gloss finish but not a product I would use again simply because of the colour and I require more coverage. Its a concealer for those that do not require any concealing!It claims to 'float over skin without creasing caking or sticking' which my sister with combination skin does agree but for me with oily skin it went in my creases.


Origins Plantscription Anti-aging foundation- colour 09 Medium Deep/Warm

With only 12 shades I was not hopeful!  I was in between 'Medium Deep Warm 09' and 'Medium Warm 08'. We opted for 'Medium Deep Warm' instead as the medium warm was looking slightly ashy on my hand.  Priced at £29.50 for 30ml bottle of a very liquidy foundation that does not cover enough doesn't appeal to me. The foundation alone without any powder looked quite greasy on me eventually and I did have creasing, this might be because its an anti-aging foundation however so would be better for mature skin types. My mum who has a darker skin tone, the foundation was perfect for her as tt brightened up her skin due to the deep orange tones, moisturised and made her skin look dewy and younger. So all in all if you have dry skin maybe even normal and mature skin and do not need a heavy coverage then this foundation is for you.


Origins Ginzing brightening mascara

THE BEST natural mascara I have ever tried.  If you like thick, separated, voluminous, long lashes, and like to build it up as the day goes, then this is the mascara for you. It will not disappoint Its designed to make your eyes look brighter and bigger. I'm not sure about brighter but the latter is definitely correct. As its a very waxy mascara, it goes on softly on each lash, giving a natural feel, and with more applications its darker and more intense. Perfect for evenings too!  I think it can even compete against the most popular non-natural mascaras!


Ginzing refreshing eye cream

Now I do not have wrinkles, but I purely use an eye cream to provide extra moisturisation to my eye area. I do not feel using just a day cream or lotion is enough. This cream is amazing! almost feels like a treat to use it every morning or when you need a slight pick me up for those puffy eyes. The smell and colour of this cream is beautiful, it smells like oranges or flowers, and its a peachy orangey colour. But the real magic comes when you put it on. Under the eyes it illuminates the skin giving it a iridescent glow! almost acting like a concealer, hiding your bags and puffy eyes. And over a few hours it does de-puff your eyes and provide relief, making them feel more refreshed. I love this eye cream, I almost feel as if its makeup, and makes my bare skin look more beautiful. It makes me want to try more of the GinZing range and try the GinZing Moisturiser that claims to boost radiance. After trying this eye cream I hardly doubt the claims are false! However £23 for a 50ml jar for the moisturiser and £23 for a 15ml eye cream would be stretching my student budget way too far. For now I'll just stick with the eye cream!
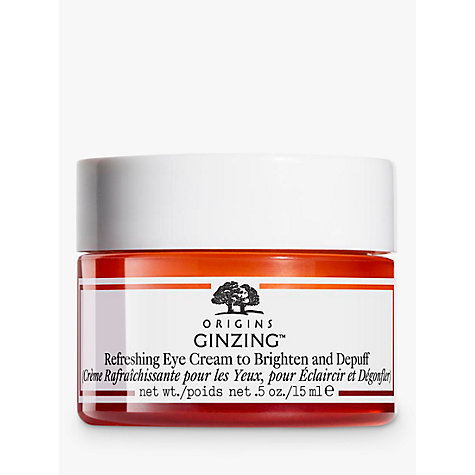
Buy Origins GinZing™ Refreshing Eye Cream To Brighten And Depuff, 15ml Online at johnlewis.com

Sunday, 28 September 2014

Review: Aknemycin Plus


A year ago I went to my doctor to pick up my usual Retin-A gel prescription, however my doctor was unable to prescribe me my trusted acne medicine, for reasons I do not understand. I immediately went into a panic frenzy, foreseeing the horror my face would become if I didnt get my hands on some tretinoin- the acitve ingredient now! I had already left it a month  and a few breakouts had begun to surface. I expected the worse and was already planning my next steps, using retinol - the commercially widely available derivative of tretinoin but has about 1/100 of the same effect. Stocking up on rosehip oil, a natural source of tretinoin. But nothing would be the same!
Aknemycin

My doctor could see how distraught I was, she waited for my little frenzy to finish and then tell me there was an alternative! A solution with erythromycin an antibiotic and tretinoin combined. A double attack on active acne and prevent comedonal acne like blackheads which I suffered with due to my oily complexion. The solution had a higher concentration of tretinoin than my last medication, which made me initially scared as I had to be very careful using the 0.01% gel otherwise I would get damaged dry, scabbing skin. I thought this was due to the tretinoins strong effects, however now that I am using the solution of 0.025%  tretinoin, I know that it was the ethanol in the gel that was the culprit.
The solution on application is like water, it evaporates very quickly, so be careful when applying on the cheeks as the vapour can irritate the eyes slightly. It was quickly absored and my skin felt dry to the touch. I use it nightly after applying a thin layer of glycerin to ease my fears of any dry dehydrated skin. Although since the switch I have nit had a severe dry reaction  as I used to. I am able to use the solution every night if I want, although I only do this around my monthly cycle or when breakouts are more prominent. Initially I used it every other night, and slowly weaned myself off to using it 1-2 a week. My skin smoother, there's very little peeling, which was a big problem with the gel. It helps my scars so much, within days I notice scars fading, pores are more refined, skin feels softer like velvet almost. Oil for me was the root cause for my blackheads and acne, the solution has helped control oil production. In fact when I notice myself getting more oily I know its time to start using Aknemycin again, and my skin is back to normal!

I'm so happy with this Acne medicine, its the most effective, gentle medicine I've ever possibly had! Its worth going to your doctor and trying out, especially if you have comedonal acne.

Saturday, 27 September 2014

Review: Sukin Facial Moisturiser

A couple months ago I decided I needed to revamp my skin care routine to accommodate my changing skin type with age. My trusty nelsons moisturiser was now not moisturising enough, every now and then I would have to mix in a little glycerin for a boost of hydration. Especialy during the summer months my skin became quite damaged and dehydrated from lack of appropriate SPF usage. There is another post on SPF, and why your using it wrong as I was, check it out here.
So on the look out for a new lotion, I knew what it had to be. Affordable, roughly the same price as nelsons moisturiser, have lovely natural ingredients to hydrate my skin, be light, absorbed into skin easily.

I saw Sukin, a brand that I had not seen before in my usual natural shop 'as nature intended' (They have a lovely website too!). I decided to try the sample and found that it was easily absorbed into my skin, smelled absolutely amazing, like orange blossom or those boiled orange sweets you get!  Turning it around to inspect the ingredients and getting ready to be disappointed with the usual nasties. I was pleasantly surprised to find a long list of  nasties that it does not contain.


I bought the lotion and over the next few weeks, I found my skins hydration had improved, the amount of oil I had was significantly lower as my skin was not producing excess oil to compensate for the dryness. My skin looked more even, felt comfortable, this might be due to the addition of sesame, rose hip  and wheat germ oil which are great for damaged and scarred skin, which I had a lot of from recent acne breakouts. It also has avocado, jojoba, vitamin E, mandarin orange, tangerine and lavender  oils as well as horsetail, burdock,nettle  extracts.  Overall I love this moisturiser I will be sticking with for the foreseeable future, unless of course I find something better, however I feel like finding this was like a needle in a haystack! I will be trying other Sukin products, maybe a night cream as I am looking for a night cream to add to my skin care regime... when it comes to anti-ageing, prevention is always better than cure!

Tuesday, 23 September 2014

SPF, Skin protection, how to use it right!

When looking for a good sun lotion there are so many things to consider. Is it natural? What strength should and do I need to use? How often do I really need to apply it?  It may officially be the start of Autumn, but think twice before throwing that SPF to the back of your draw.

Below is a link to a great post, with detailed scientific information about why your SPF may not be working for you, from our sister blog : The Case of the Curious Scientist.

http://occasionalymadscientist.blogspot.co.uk/2014/09/uv-protection-de-bunked-put-down-glue.html

Sunday, 13 October 2013

Natural Home Made Facial Cleansers For All SKin Types

Dairy Cleansers


Dairy based cleansers such as milk, yoghurt and cream have gentle ex-foliating properties on the skin and help to lift dead skin particles along with dirt and grime. Not only is it a natural way of cleansing but its very cheap.


Oily, Acne or Inflamed Skin

- Use Organic natural live yoghurt twice daily

-Apply with fingers all over the face and neck and gently rubbing in areas then sweep off oil, dirt and make-up with cotton wool.  After you have cleansed thoroughly  you may rinse your face with warm water.

Skin is immediately matte, brighter, given a clean and fresh look.


Sensitive or Combination skin

-Use Organic Full Fat Milk

- Apply by dipping cotton wool in the milk and in sweeping motions wipe of oil, dirt and make-up across the face and neck.  After you have cleansed thoroughly you may rinse your face with warm water.

Skin is immediately  brighter, glowing, cleansed and smooth.


Dry, Mature, or Dehydrated Skin

-Use Organic Double Cream

- Apply by dipping cotton wool in the cream and in sweeping motions wipe of oil, dirt and make-up across the face and neck.  After you have cleansed thoroughly you may rinse your face with warm water.

Skin is immediately glowing, glossy and smooth.


Vegan Gel Cleanser


Don't worry my vegan friends as I have a gel based non dairy derived cleanser too.

-40ml Aloe Vera Gel
-20ml Thick Vegetable oil such as Jojoba or Apricot Kernal
-6 Drops essential oil of your choice for your skin type. You could choose from my chosen cleansing essential oils and use more than one or combine them for different skin types for example- for dry and mature skin you can mix 3 Drops Rose absolute and 3 Drops Neroli.

Essential oils for Oily or Acne Skin

- Tea Tree, Grape fruit, Petitgrain, Myrtle


-Essential oils for Inflamed skin

-Cederwood, Juniper, Niaouli

-Essential oils for Combination skin

-Geranium, Palmarosa, Myrtle

Essential oils for Sensitive Skin

-Neroli, Rose, Rosewood

Essential Oils for Dry Skin

-Rose Absolute or Rose Otto, Roman Chamomile, Neroli

Essential oils for Mature skin

-Frankincense, Neroli, Rosewood


Store Your Cleanser in  a dark glass jar and it will keep for 2 months.


Written by Similicious


Wednesday, 9 October 2013

HOW TO MAKE LIQUID FOUNDATION FROM YOUR MINERAL POWDER FOUNDATION

I have only tried this with Lily Lolo mineral Foundation, concealer and blushers but it may work with other brands also.


MIXTURE:

1. Mix 1 Part Vegetable Glycerine and 1 Part Water or Rose Water and keep in a bottle.

2. Mix small amount of the Water/Glycerine with some Lily Lolo powder foundation or powder of your choice till you get the desired liquid foundation consistency or cream consistency. 

3.You can follow the same technique for making liquid concealer and cream blush from powder concealer and blush. 

Tips for the Mixture:

1. You can make a batch of this Liquid foundation and keep it in a old lily lolo container as I do by removing the sifter from the container or you can buy a make-up container from your drug store. 

2. You can make a tinted moisturiser by adding less minerals, or a medium to heavy coverage foundation by adding more powder foundation.

APPLICATION:

1. Cleanse face and Ex-foliate twice a week for best results

2.Moisturise and wait 5 minutes if your moisturiser is heavy

3. Apply Liquid foundation with a damp make-up sponge, I use a angled sponged starting from the forehead and down to the face. You can also use a Mac stippling brush.

4. If you need concealer you can make liquid concealer from your powder concealer and apply with fingers in a tapping motion or a concealer brush.

5. THIS STEP IS ONLY IF YOU ARE USING CREAM BLUSH, if you are using powder blusher please go to step 6. Use your cream blush mixture by blending a tiny amount onto the apples of your cheeks with your fingers or a stippling foundation brush. Lily Lolo blushers are strong pigmented colours and you only need a little.

6.  Use the Lily Lolo Foundation as a setting powder by stippling it on with a Kabuki brush or Buffing brush  by pressing the brush on to the face starting from your forehead down to your chin to set the liquid mixture on your face.  Do not use the brush in circular motions as you will rub off your foundation giving it stride marks.

7. Apply the powder blusher if you didn't use the cream blush method and also apply eye shadow etc. as you normally would.

Other tips:


1. Use Holland and Barrats Aloe Vera Gel under your moisturiser as a Primer For long Lasting effects in Humid Weather. Avoid using Aloe Vera over moisturiser as the mineral foundation would not apply on smoothly. I also use Bare minerals Primer around the mouth and nose on top of my moisturiser for extra non melting powers but only in the summer.

2.You can use oils such as Jojoba Oil mixed with your Lily Lolo powder foundation as this looks amazingly glowing however it starts to reveal my smile lines and lines under the eyes even with the powder on top to settle it.

3. I have tried other methods such as mixing it with a primer and applying it. I used Bare Mineral Primer mixed with  Lily Lolo and it didn't work well and dried very quickly when I tried to spread it. Its the same result trying to mix it with Aloe Vera Gel.

4. A friend mixes her mineral powder with Bio Oil but you cant keep that in a container for over a day as it will start to grow fungus and that does sound scary considering your putting that on your face and its growing bacteria. 


Thursday, 14 March 2013

Got No Time For Breakfast, Breakfast On The Go Superfood Smoothie!

Got No Time For Breakfast, Breakfast On The Go Superfood Smoothie!


I have no time in the morning for breakfast as I'm spending all my time trying to look good for work and I was missing the goodness of breakfast for months till I discovered My Breakfast on the Go Superfood Smoothie.

I make this smoothie for 6 days in advance on a Sunday so every night Mon-Thurs I just put it in a bottle ready to take to work and I have some left over for the weekend.

Recipe for 1 Glass:

  • 4 Strawberries
  • 4 Blueberries
  • 1tsp Goji Berries
  • 1tsp Acai Powder
  • 1tsp Maca Powder
  • 1tsp Ground Flax
  • 1tsp Oat Bran Grounded in a blender
  • 1tsp Physillium Husk Grounded in a blender
  • 1tsp Chia Seeds
  • Unsweetened Almond Milk or choice of Unsweetened Soya, Hazelnut or any other milk. Measurement depends on how much fruit content you have in a glass. If your fruit mixture makes half a glass then add half a glass of milk.

Method:


1. Blend all the Ingredients together except the milk.
2.  If your blender has measurements then add milk till all the contents fill upto  250ml. If your blender doesn't have measurements then put all the fruit mixture in a glass and fill the remaining glass with milk and then pop back into the blender and wiz. This gives the perfect measurement for a glass.
3. Add the Chia Seed and Stir with a Spoon.

This smoothie doesn't need to be sweetened due to the fruit content but If you prefer you can add Agave syrup, Fruit sugar or even better Stevia.

The reason I haven't mentioned adding regular sugar as it is not Low in GI and increases your blood sugar level causing skin to breakout and if you want Glowing Skin its best to avoid Raw Sugar, Brown Sugar and all Cane Sugar. For Glowing Skin its best to stick to low GI Foods.

This smoothie does thicken due to the Oat bran and Pysillium husk expanding but you can shake it and add a little milk to get the normal consistency.

I have been taking this smoothie for a week and I don't feel fatigued and energy less during work and in the morning when I wake up.

Friday, 5 October 2012

DIY: Glycerin Hair detangler

For a while now ive been wondering what effect would glycerin have on the hair. It works so well for my skin as moisturizer, why not on hair?

So after showering and washing my hair I applied a mix of 1/2 glycerin and 1/2 water to wet hair. I left it to dry before combing through with a boar bristle brush. Usually I would arm myself with a brush and have a battle with my hair when it dried and every time I stepped out (london = crazy wind), but with  the glycerin I don't have any tangles, but a smooth cascading tangle free mane of hair!!! oh and another perk, it gives hair an immense shine!!
Forget buying expensive detanglers, and shine enhancing serums or what ever product is promoted on tv( usually with a beautiful model + truck loads of extensions saying they're worth it!), You can make a bottle of this detangler up which will last you about  8 months if not more.

If you wanna save a couple more pennies, buy your glycerin in bulk it really is a multi - purpose product! I buy mine from http://enaissance.co.uk/ under natural ingredients. I buy the 5 litres for £22.99 as it saves me more in the long run, but prices range from £1.59 for a 50ml bottle. Its vegetable derived glycerin too.

Glycerine, Vegetable
Next time I will  use distilled water and maybe add some essential oils for a more beneficial effect and for scent.

Rating: 8/10

Review: Bravura London Dermaflannel

When I was shopping for Acid peels online ( bravuralondon.com) I came across an alternative to acid peels called a Dermaflannel. This is essentially a towel, with microfibers that help to exfoliate skin  with ease. It claims to be gentler than microdermabrasion but with equally effective results. Also helps to improve the following conditions;

Acne

    Acne scars
    Age spots
    Blackheads
    Brown spots
    Discolorations
    Dry skin
    Dull skin
    Stretch Marks
    Freckles
    Fine lines
    Wrinkles
    Hyper Pigmentation
    Red spots
    Rough uneven skin
    Scars
    Sun damaged skin
    Enlarged pores

At the time when I first purchased the dermaflannel, I had around 5 of the above conditions. Its been a year since then and with the help of the dermaflannel I wore a bikini to the beach for the first time in my life!!!
My acne scars had faded so much, still visible but they looked so much better  I had fewer blackheads, pores were kept clean by the flannel so did not enlarge, and lastly.... STRETCH MARKS!! The results with stretch marks are very very gradual, mine are old, but for newer stretch marks i think more dramatic results would be seen. Im still using the dermaflannel, so i am  hoping with time i'll see better results.

You cant use this with any other exfliation products, or do take care and leave alot of space of time between each exfoliation. Even though it is a towel it is very strong! There have eben times where ive grazed myself with the towel.


The reviews on the it where all great, 5 stars from 25 reviews. And only £11.99, its well worth it!! But it does tend to go out of stock for long periods of time, so if its in stock BUY! also my first cloth lasted me about 7 months, and i was using it  3 times a week. With proper care it should last a long time.


Rating 10/10

Thursday, 27 September 2012

How to heal over exfoliated, damaged skin!

Damaged skin be it due to over exfoliation, chemical peels, medications and other harsh chemicals can be very hard to deal with. Skin feels irritated, raw, red, wrinkled and flaking of skin may occur. Makeup may seem like a good idea to cover up, but it can sometime exasperate the problem and make damage appear worse that it is.

I should state the reason that I'm writing this is because I'm currently sitting on my laptop typing, while the left side of my face is severely damaged due to increased sensitivity by retin - a, it looked fine, but i had to go on and put tea tree cream on the side of my spots which had a few spots, nothing major just tiny little bumps, but the tea tree has just made my skin red,raw, and scab like... not nice, if i open my mouth to eat for example, the skin is unable to stretch so looks and feels like sand paper!!! ugh!

Now I don't know anything that can make your skin as good as new in a second, but there are things you can do at home to ensure skin renewal is at its optimum level. Some of these you may already be doing, but you may be doing things you think will either cover damaged skin, or help it heal faster, but really it's just making things worse!
  1. Do not exfoliate further!!  This might seem obvious to some, but when you have you to leave the house in 10 minutes and your skin is peeling to no end, that bottle of exfoliator seems like your last choice! This will only make your skin more damaged, raw, and you might end up with a scab rather than a bit of flaky skin!
  2. Treat your skin very gently!  Try not to use facial wipes, even if they're organic, the fibres tends to be very abrasive to skin, especially sensitised skin. Be gently with your towel or facial tissues(best to use a towel) so pat dry gently. 
  3. Really think about what your putting on your face! The products used on your skin whilst it was normal, may be detrimental in a sensitised state. For example I steer clear of my normal vitamin C lotion when i have over exfoliated, as vitamin C will only cause your skin to shed further. Don't assume just because a product is natural it will be safe for your skin. The very cause of my damaged skin was because i assumed my tea tree cream was organic, hence would be safe for my skin.  DUMB!!!
  4. Put things on that are known to treat damaged skin! Products rich in Vitamin E are great for skn renewal, especially and oil like product or a balm.This will prevent the skin from drying out as the skin is exposed and thin. Try to treat it like a burn. Sweet almond oil, Grapeseed oil, Rosehip oil are all good sources of vitamin e, except the latter which is a source of Vitamin A. Do patch test these, as a further reaction on your skin is the last thing you want!
  5. Work from the inside out!... Your skin is re building it self, it is doing this all the time so truly you should be providing it with the essential building blocks it needs ALL THE TIME, but it would not hurt to up the water intake, and eat foods rich in vitamin E, protein, essential fats, Omega 3,6 and 9. 
  6. It takes about 28 days for the skin to renew itself, but the initial damage should go away in less time!! Im hoping to rid my skin of this damage in 3 days!! Luckily i don't have any where to be, so i can hide out in my room, lathering my face in balms!!
I thought i would add what I'm doing right now to get rid of the damage, and to cover it up when you just have to be out in public! 

When I'm at home I am putting glycerin on my face after washing with a facial gel( to further the healing, cleanse with full fat milk-- do not use cotton wool, it will just be abrasive to sensitive skin, apply the milk with hands in circular motions, best done when you don't have makeup on). The glycerin is diluted wiht a little water( dilute with more water if you live a particularly dry environment, Im in London so its pretty humid over here!). The glycerin will stop the skin drying out. Then i apply aloe vera gel, for it soothing properties, And lastly sweet almond oil. Your gonna look like a grease pit, so don't answer the door bell! 
I would normally also apply rose hip oil  as well at night, but ive run out :(. And in the day even if I'm in doors, i will skip the aloe Vera and apply my OY! SPF 15, even if I'm indoors as it contains aloe Vera, green tea and chamomile, which are great for damaged skin to calm the skin. 

I will update this post to show how many days it will take to heal my very damaged skin!


Ok so It took about 4 days for my skin to heal by doing the above routine. My skin was stil peeling yesterday(4th day) but it was well enough for me to do a facial (rose akamuti) and hair removal( threading) . All in all I think a mixture of rosehip oil and glycerine really helped my face!!.

Wednesday, 26 September 2012

Review: Oy! medium face the sun spf 15 moisturiser

OY!  which stands for 'Organic Young' is a line of skin care for young skin by Green People. This is the first product from their line I have tried, and as its so good I will soon be trying their other products.

I first received this moisturiser as a sample from naturisimo.com. I applied it over my usual moisturiser to protect my skin from the sun, due to increased photosensitivity due to Retin - a use. I expected my skin to go oily and my makeup to just slide off in the heat and humidity as i already have oily skin and SPF's in the past have just exasperated the problem, whether they are natural or not. However as soon as i put the moisturiser on, it left a very comfortable moisturised but matt finish to my skin, and it did not leave a purple tinge to my olive Asian skin tone, which i usually got with SPF's.

My Lily Lolo mineral makeup went on perfectly on top of the SPF and almost felt like it was helping the makeup stick to my face, but in a good way. On an average day, my skin will start to go oily within an hour, and I would have to retouch as soon as I get into uni, but this time when i had to touch up there was no ugly oily mirror like shine, but more of a moisturised kind of sheen to my face. Even a few hours after that it was great and I have major oil issues!

It seemed to good to be true, so when my sample finished I wanted to check the price, ingredients etc to see the damage... I was pleasantly surprised!!  Not only was this an SPF moisturiser thats great for oily skin(rare!!) and sensitive skin type, but its also an tan accelerator increasing tanning by 25%, fights spots, UVA/UVB protection and feeds skin omega 3+6 . On the ingredients side of things it was free from the major nasties; sodiun laryl/laureth sulfate,parabens,lanolin,phthalates,propylene glycol,alcohol(ethyl,ehtanol),harsh foaming agents , irritating emulsifiers, synthetic fragrance,silicone,PABA sunscreen,colourants,PEGs, petrochemicals,urea,DEA, or TEA.  And is 82% certified Organic, not 100% but still good enough!.

I think the spot fighting and oily balancing properties may be due to the aloe vera and green tea amongst the ingredients.

This product is fairly traded too.....And for you veggies and vegans out there.. its been certified by the vegetarian and vegan society!

The price is good for such a multi-purpose product, its £10.50 from naturisimo.com for a50ml bottle, a little goes a long way for me as i use my normal Jason ester C moisturiser underneath.


Rating: 10/10

Sunday, 23 September 2012

Review: Retin-a 0.01% GEL

I know this blog is about natural beauty, but i simply have to write about a product regardless of its content, when it is life changing.

For about 2 years now acne has been causing a bigger problem in my life than it had in the past. The large spots were gone, but the acne had become more ''comedonal'' so i had more blackheads,whiteheads,large pores and oiliness. I was not able to combat this with a usual good skin care routine, or diet. So I had to change my usual acne medicine ' duac once daily gel' which is for acne spots rather than comedones, to retin -a. 

Retina- a is good for skin with comedonal acne, wrinkles, to prevent ageing, to increase collagen in skin etc.

Now Retin - a is trickier to use than ordinary benzoyl peroxide acne creams. It has more side effects, and requires additional skin care to  give optimum results and to ensure side effects are kept to a minimum.  Side effects include; peeling, irritation, dry skin, dehydration, sun sensitivity and more which i have not experienced. Despite all this, I have been using Retin-a for a month now and I will never go back to anything else.

The first week i started using Retin-a gel, i used it without a moisturiser, and every other day... BIG MISTAKE!. My skin can usually handle anything, I do not get irritated unless its an ultra strong chemical peel. But this made my skin peel like crazy, there was endless flaking, skin was drier in the morning, but a perk was my pores already looked smaller, and they were started to look like craters!!. I was told that the skin had to get used to the Retin -a, so peeling was to be expected. 

The next week I used it about 3 times a week, peeling was more minimized and confined to the mouth area only. I had to avoid the sun, and use a spf of 15 at least, as retin-a makes skin more sensitive to the sun and burning, but oddly enough it can also reduce previous sun damage. Anyway iv started using OY! natural spf15 which is great for oily skin and if you have a darker skin tone, its practically invisible.( will do a separate review because its such a fab SPF)  Blackheads and whiteheads have cropped up more, i think this was due to the skin peeling which was showing up blackheads and whiteheads which were covered underneath skin layers. It was also the time of the month so the additional acne may have been hormonal. 

The third week, i used Retin -a twice a week as i was going to start uni and wanted less peeling. The peeling was covered with moisuriser alone, but seemed to show up with mineral makeup. However I did not have any peeling this week as I was used Retin -a with glycerin. I applied my normal moisturiser, then i applied glycerin mixed with water, and once it had dried  i used retin a.  

This week, I no longer have irritation, flaking. The blackheads and whiteheads are virtually gone. I find it hard to see some of the pores that were medium sized before. The larger pores are now medium sized, and i hope with time they will disappear too, as my doctor advised it could take up to 6 months for full effects to be seen.  My skin is also less oily, and feels more plumped up already. 

I didn't think anything could shrink the look of my pores, or get rid of my blackheads, but retin-a has and in such a short space of time too.

Rating: Would give 10/10, but peeling can be frustrating so 8/10

Saturday, 22 September 2012

Review: LILY LOLO Lash Alert natural mascara

Ive been looking for a natural mascara that wouldnt break the bank and produce the same look as a 'fake' mascara. Lily lolo natural mascara does exactly that.

Lash Alert Natural Mascara

The mascara comes in a small 10.5 ml bottle, a little smaller than most mascaras, but a little goes a long way. The mascara is very dark, so accentuates lashes more as its a dark black matte colour rather than glossy, so it absorbs more light, appearing darker. It does lengthen a little, but it makes lashes look more thicker than any other mascara ive used.  It goes on very easily and smoothly, only a few strokes are needed compared to other mascaras, where i have to apply on more and keep brushing to ensure no clumping of lashes. This mascara does not produce a spider lash effect. I have had mascaras wich are able to sepereate the lashes better, but its good enough, as it doesnt clump lashes together either.
You can also apply mroe coats during the day for a fuller doll like look. 

One negative is that during the day, you may get tiny specks of the mascura that have fallen of the lashes and 
have landed on your face. But this can be easily sweeped away. 

It costs £9.99, wich is hardly much for a good quality mascara that wont irritate your eyes and is healthier for you than other toxic mascaras.

Rating : 9/10.. purely because of the flecks that falls sometimes

Friday, 7 September 2012

LILY LOLO FOUNDATION REVIEW AND COMPARISON WITH BARE MINERALS AND JANE IREDALE

HOW I CAME TO MINERALS:

I have tried allot of brands of foundation from drug stores and some expensive branded foundations but as they contain ingredients such as perfumes, synthetic chemicals, parabens, and other nasty ingredients I feel they made my skin dehydrated, red, sensitive, flaky and gave me blemishes. The expensive brands were great for the Kim Kardashian look but in the long run using them everyday especially with acne and generally troubled skin gave me slight wrinkles around the eyes and mouth, and without make-up my sk  in looked horrible and yes I needed more and more make-up So I decided to use a Natural ingredient Foundation and so Lily Lolo came along. I thought switching from unnatural liquid foundation to natural mineral Lily Lolo powder foundation would be really hard but it was the best thing I have ever done for my skin.

You don't have to worry if you cant live without liquid foundation as you can turn Lily Lolo Foundation into a creamy liquid (Liquid minerals recipe below). I have not tried it with the other brands but it probably would work the same.

COMPARISON:

Using Mac Minerals or Rimmel Minerals is not the same thing as they may contain 100% natural minerals but they are not 100% natural products as a whole so you will still be putting allot of unnecessary chemicals on your face that it really doesn't need.

I have now been using 100% natural Lily Lolo Mineral Foundation for over 6 years and it was the first ever natural makeup I have tried before venturing into other brands but always coming back to Lily Lolo.

The reason I tried other brands like Bare Minerals and Jane Iredale was because I have to mix two different shades of Lily Lolo foundation "Cinnamon" and "Butterscotch" and I thought other brands would have one perfect shade. I found that none of the other brands had a shade close enough to my skin tone and even after mixing two shades they were very far off.  Bare Minerals Matte foundation was too reddish even the yellow undertone "Golden Medium"one made me look like a tomato. I tried so many of the Jane Iredale colours from the Amazing Base Range and they were either too light or too dark, too purple or too ashy but not in the middle.

However I do feel that Jane Iredale powder was long lasting and the look on the face was very soft and glowing and it didn't show up my smile lines or separate from the creases on my face even in the summer. I used Jane Iredale Amazing Base mostly on top of Jane Iredale Liquid Minerals which was also the wrong colour. I feel Bare Minerals would come second to Jane Iredale because it had a really nice soft finish and it was also long lasting. Now this doesn't mean that Lily Lolo doesn't apply nicely because it does have a flawless finish and I do look great but I think the others give a nicer sheen and it could perhaps be because the powders look like they are more finer and perhaps because they have more ingredients. Lily Lolo use only a few ingredients and most of all it does not contain some of the sensitising ingredients such as Bismuth Oxychloride  that some other natural mineral make-up brands contain like Bare Minerals Original foundation. I have read Bismuth Oxychloride doesn't effect everybody but for some it can be very irritating. Jane Iredale contains Dimethicone which isn't considered harmful but some people may get irritations. 

Jane Iredale amazing base foundation contains natural SPF20, Bare Minerals and Lily Lolo Foundation contains SPF15 except for BareMinerals Ready SPF20.  I don't need to use sun lotion but that is because I have a darker skin tone so I don't need a high SPF but if you have pale skin I would suggest using sun lotion too. All three brands of foundation don't feel heavy and I actually forget I'm wearing make-up.Jane Iredale is more expensive than Bare Minerals and Lily Lolo and I got less mineral powder compared to Lily Lolo which is the cheapest.

Overall Lily Lolo Foundation colours work better for me and I get more minerals for my money. However I do feel that Bare minerals and Jane Iredale may have been better in terms of longer lasting and in the heat if the colours were right for me.

LILY LOLO DURING THE SUMMER:

I have combination skin mostly but its really oily during the Summer where I have occasional face make-up melt downs, I feel that my make up stays on longer when I apply Lily Lolo foundation with my liquid method as I touch up only once at the end of a working day as oppose to the original powder application. If I use Lily Lolo Foundation with the original powder application I have to use Aloe Vera Gel under my moisturiser as a natural primer and a primer such as Bare minerals primer on top of my moisturiser as well as Lily Lolo Matt Finishing Powder on top of my Foundation and I apply this before I start work around 7.30am and I will fix it around my nose and mouth just with the powder foundation around lunch time and tea time as I am most oily around those areas. I will touch up again but all over the face with my powder foundation and finishing powder when I'm leaving work as its extremely hot in the trains when I am going back home. So I always prefer my liquid method.

LILY LOLO DURING THE WINTER: 

Applying Lily Lolo Foundation during the winter I feel I don't need the Finishing Powder as it stays on longer. I am happy to apply it in both powder and liquid form. However I still use Aloe Vera under my moisturiser as a primer.


Rating: 8/10 , would give 10/10 if they had more darker ranges in the concealer powder and perhaps more yellow toned foundations.

For How to Make your Mineral Powder into Liquid Mineral Foundation Please follow the link Below-
http://natural-beautyaddict.blogspot.co.uk/2013/10/how-to-make-liquid-foundation-from-your.html


Tuesday, 14 August 2012

Laidbare pack your bags eyecream review

Usually when planning on writing a review I would wait a week or so or longer so I know that it actually works. However my Laidbare pack your bags eye cream only arrived a few hours ago and i applied it straight away. I bought the eye cream on line having never bought an eye cream before, i thought it was time as my under eye area was becoming drier and darker  due to several sleepless nights and over rubbing. I did not think it would do anything for the circles, but it would be rich enough to moisturise.

When putting the cream on I was delighted to find i only needed a tiny dot for each eye ( when i mean tiny, i mean microscopic). It glides over the skin, and is so so rich, I immediately knew this tiny 30ml tube would last me many months. Anyway so over I went to my laptop,checking e-mails  etc, but when I got up a few hours later to look in the mirror the skin under my eye was definitely tighter, plumped up. As for the eye circles I do  not think it would work in a few hours, But the circles definitely looked more blended into the lighter skin on my face, not like a completely darker  cut off crescent.

The cream claims to lighten and tighten, and is in their anti-ageing range. It can also be used on the decolletage area to countour and brighten. I have yet to try this, but my eyebags are my main concern at the moment.

I do not know if all eye creams give this effect straight after, or if its just because my under eyes are getting the moisture that they needed, but I am very happy with the results, and i cant wait to see what it does in 1 weeks time.
I will update with results as soon as poss!!!


Rating: 7/ 10

Tuesday, 15 May 2012

Healthier hair with Home made shampoo recipe

Many of you may of heard of the 'no poo' method of washing your hair, which consists of a mixture of baking soda and water to wash your hair followed by a apple cider vinegar rinse. This works for many people, however it did not work for me even though i tweaked the recipe for hard water areas. No matter how much I used the baking soda mixture, i would still have a patch of greasy hair that simply wouldn't shift. I still  use this method about once a week for deep cleanse and as a clarifying treatment. Although I do not use hairspray, gel, mouse ,serum or anything like that I still do a clarifying wash with baking soda  as I take the tube everyday and living in London isn't really like living in the countryside where fresh air is plentiful.

But I have found a miracle shampoo not only is it great value for money, but it lathers like a synthetic shampoo without all the nasties (parabens,silicone's etc). The home made shampoo consists of Dr Bronners Castile Soap i use the unscented version as the soap can be used for many things, so i can add my own different scents. 

In the beginning the castille soap made my hair literally like a birds nest, it felt and looked like fine hay because of the soap residue. I was going to give it up and switch to my baby shampoo, but then i thought, apart form the soap scum it was pretty good, I only needed about 30ml of the shampoo and it would lather so nicely, gave a nice shine apart from the hay feeling and powdery texture. 

I googled and did some research and I added herbal tea to my mixture along with glycerin, i also reduced the soap content, and now its pretty much perfect. This is the recipe below;

Home made Castile soap recipe

Dr Bronners Castille Soap 1/2 cup
Distilled Water  1 cup ( Boil water for 5 minutes, and leave behind a little water with the white minerally powder that makes the water hard)
1/4 CUP glycerin (makes the shampoo have a smooth soft feeling, keeps hair hydrated as it is a natural humectant)
2 tsp  baking soda ( for very greasy hair, 1tsp for dry hair or 1/2 . You can omit this, but i think its good as it makes water soft too as well as cleaning)
1 cup herbal tea ( chamomile,green tea,white tea. ( mostly anything goes!) Some are better for hair e.g chamomile, rosemary,sage etc. Remember the colour of your hair may be affected by some teas, e.g if your blonde i wouldn't use a red fruit tea, or blackcurrant tea, it may tint your hair , especially if its dyed already)
A few drops essential oil of your choice
1tbsp Oil (olive,jojoba,argon, etc)

Mix it up  and store in a bottle. You only need a little and it lathers up pretty good, I have alot of water in my recipe you can reduce this either by omitting some water from the tea or just less water.

I found that this has helped with my transition phase of trying to stretch my washes from once a day to every other day. I think next week i will try to wash my hair every 3rd day, and slowly increase.

I'm going to dye my hair soon with henna so i shall be putting a post up about that too.

Sunday, 13 May 2012

Make Your Own Toothpaste!

I know this sounds disgusting, the first time I heard of making my own toothpaste, I didn't think it was one of the 'green' lifestyle choices i was ever going to be ready to try... UNTIL last week.

To say Ive had a slight obsession would be an understatement... I MUST , MUST ,MUST brush my teeth at least 3 times a day. I just hate the feeling when my teeth don't feel smooth, i wont be able to have a meal if i don't brush before hand.. its really weird i know. But anyway, despite the gentle obsessive brushing, they would never get pearly white. My teeth weren't yellow like a smoker, but they definitely were not bright white, More like an off white, but it would show against Red lipstick for example. 

Changing my toothpaste was something i have been meaning to do for a long time, but i would always put off for a few( important) reasons;
  1. Would my teeth be really clean?
  2. Would this affect my breath?
  3. Would this cause my teeth to fall off as a result of not being clean?
  4. Would the health of my gums deteriorate?
  5. Would it taste BAD?
  6. would it be messy?
If it was any of the above, i would probably never try a green toothpaste again. I had tried Holland and Barrett's aloe Vera toothpaste in the past, but decided it was too expensive..we are in recession after all people! and I'm a student  so beggars can not be choosers!

I researched some natural and cheap toothpaste alternative and came across baking soda (you really can use this in everything) and salt tooth powder.

People use to use this in Victorian times, although they're tooth powders also contained crushed enamelware and chalk. I thought i would try the recipe omitting the chalk and crushed up glass of course.

I made some amendments to make my toothpaste have the following properties;
  • Anti-bacterial
  • Fresh and Minty
  • Combat bad breath
  • Healthy Gums
  • Whitens teeth slightly( not making any promises, just reduce the tea and coffee for full effect)
Also it doubles up as pretty nice mouthwash.

What you need;
  • 4 TBSP baking soda (bicarbonate of soda if your in the UK) - helps with the cleaning and whitens teeth
  • 2 TBSP Salt( this is what provides the abrasive power)
  • 7 drops Lemon essential oil (for taste but also antibacterial, and gives a nice sherbet smell)
  • 6 drops rosemary (anti- bacterial and viral)
  • 6 drops Peppermint oil or Mint oil ( Purely for taste , but also good for health of teeth and to freshen breath)
  • Optional but should be added if you have halitosis or just to freshen breath: 6 Cloves crushed up or 8 Drops clove essential oil
  • 2 cm crushed Licorice Root ( optional)
All ingredients need to be ground  up either in a grinder or pestle and mortar will do. Store in a Jar
When your ready to brush teeth, sprinkle some powder onto tooth brush( DO NOT dip into the powder as this may spread germs,Especially if your ill, or if this is intended for sharing). Brush as normal paying attention to gums and teeth properly. The brushing is responsible for cleaning, this goes for your chemical toothpaste too.   When rinsing, the powder will dissolve and make a nice gargle. This doesn't foam, so you may miss that from your normal toothpaste, but you get use to it. I cant imagine using a foaming teeth cleaning product anymore, it feels alien to me, and its only been a week!

After doing this my teeth felt so smooth, my gums felt healthy and smooth. My mouth was invigorated and felt a little tingly. The smooth feeling lasted longer than when i used my synthetic chemical toothpaste too. Also this tastes good when you get use to the salt taste, although my sister doesn't like the taste, she loves the smell!

But if you do not like the taste you can buy XyloSweet which is a natural sweetener that is good for your teeth too. I have yet to try this so i cant offer my opinion.


As you can see my tooth powder looks a bit like plain flour because Ive made it very fine. if you only grind it up a bit it will have more thicker pieces and look more crystal. I would recommend grinding a bit as the salt may get in between your teeth or irritate your gums.

I'm currently working on mixing up a new batch of tooth powder to whiten your teeth some more, and provide a longer lasting fresh mouth feeling! Watch this space!

x

Swe

How to reduce dark eye circles, eliminate puffy eyes and tired eyes

Its really hard to get rid of dark eye circles especially if they are due to hyper-pigmentation or damaged skin and especially if you have darker skin tone. Darker skin is more prone to dark eye circles as the broken capillaries show up more rather than on white skin tone. As we age our skin becomes thinner and we lose collagen and fat around that area so the broken capillaries show even more making the circles appear allot worse. Lifestyle can be the cause of dark circles, Is there anything your doing that is unhealthy for your body or are you pushing your body through its limits? Less sleep, sun exposure, bad diet, stress, allergies are all lifestyle tolls that can be a result of dark circles. People with nasal congestion can get eye circles as the condition dilates and darkens the veins that drain from the eyes to the nose.

I got my dark eye circles at a young age through late night exam revision and constantly rubbing my eyes on bad hay fever days (very bad idea) also its hereditary and being of Asian skin tone it didn't help either. I sleep for 8 hours a day and my circles didn't go even after trying so many drug store creams. I wasted allot of money on creams that did not have natural ingredients and I believed they would work but they didn't. Some of them even made my eye area very sensitive.
I have tried cucumbers and they only help cool down the area to improve eye bags which is good if that's the only problem you have. I discovered the best options for me was the Barefoot Botanicals Rosa Fina intensive eye serum and Rose Hip Oil, I cannot live without them. It has improved my dark circles and the pigmentation that forms the dark area. Most of all it is actually like using botox (even though I haven't tried botox) as it deflates my morning puffiness immediately and smooths out the area. I use it at night and over my day cream and under my makeup. I also use Clippers decaf green tea as mentioned in tip 5 below which helped reduce my dark circles. I stopped doing the green tea for a while and the eye circles were coming back so using the green tea in conjunction with the Rose Hip Oil and the Rosa Fina Intensive Eye Serum increased the process of improving dark circles. You have to keep doing it as your lifestyle is still carrying on causing the circles to increase so green tea must go on.

These are some extra tips to reduce puffy eyes and dark circles:

1. Avoid sun bathing as melanin is increased and is the cause of skin pigmentation and can darken the eye area.

2. Drinking alcohol and smoking cigarettes can cause them; even overindulging in caffeinated sodas [source: Mayo Clinic].

3. Avoid rubbing or scratching the eye area and if you have irritations apply Aloe Vera Gel to cool and heal.

4. If you have allergies take a allergen remedy to avoid irritations on the eye area.

5. Avoid drinking water within 1hr before sleeping, I get puffiness in the morning if I do.

6. Avoid sleeping without a pillow or a very flat pillow as water retention forms around the eyes if your head isn't elevated.

7. Drink organic green tea or green tea which does not have bleached bags and use the warm tea bags over the eyes for 15 minutes or longer if preferred for a relaxing lay down (avoid wearing nice clothes as it stains and wont come off unless you use bleach, and believe me I have ruined allot of nice sheets and clothes). I do this at night sometimes as it relaxes me and I just fall asleep with it on after applying my Rosa Fina eye intensive cream and serum.

8. In the morning press the inner corner of your eyes softly with your middle finger keeping it there for a few seconds then gently press moving outwards along the inner brow area towards the outer eye. this will diminish the look of red eyes and awaken you as the blood flow is increased around the eye.

9. For dry eyes use Pure Rose Hip oil as it will make it appear glowing and decrease wrinkles.

10. Definitely get allot of sleep but do not over sleep more than eight hours as I have noticed I get puffy eyes.

11. Getting a full length sleep without snooze alarms and disturbances stops you from waking up and going back to sleep which give you tired eyes hence puffiness so sleep early and get in a habit of waking up on time so you don't need the snooze alarm plus you will see how much you feel fresher.


I drink Decaf green tea as I avoid caffeine.


Written by Similicious!

Saturday, 12 May 2012

How to eliminate Blemishes, Marks and Scars

I have been miserable with the most confusing skin since a teenager having spots with dry sensitive skin, patchy areas and I was called ugly by mean kids. Now that the ugly duckiling days are over, being 27 I have to bear in mind that wrinkles are probably around the corner. During my teenage years I developed scars from popping spots and skin discolourations from eczema creams and constantly itching on my body also by trying out a facial hair removal cream at school once when I didn't even have hair but my friend tried it so I tried it (stupid I know aaaargghhh), anyway it peeled my skin off (ouch). Being of Indian skin tone does not help either as it shows up darker areas around the mouth and eyes rather than being red as it would on white skin tone. After trying various brands sold at drug stores before turning to 100% natural products I have found the solution finally to remove my bad luck blemishes.

Now you can say goodbye forever to your blemishes, marks, scars, and discolourations with key ingredients as discovered by Scientists. Pure Retinol from a natural origin is the best found ingredient to remove these skin imperfections and is most potent in Pure Rosehip oil extracted from the seed. Rosehip oil is renowned for reducing scars after surgery and improving conditions of damaged skin. Best of all its FOR ALL SKIN TYPES even acne prone skin like my sisters. Vitamin K works in partnership if combined with Retinol to increase the benefits of scar removal and particularly for dark circles as it has been widely used to assist in the treatment of bruising around the eyes, as well as in the prevention of such skin discolourations and is found in Soya bean oil and Canola oil.

Before discovering Rosehip oil I used Rosa Fina decolletage serum by Barefoot botanicals as I thoroughly researched all the ingredients and they all benefit the improvement of marks and scars. My skin improved significantly making it appear glowing, smooth and it completely faded out premature wrinkles around the mouth and eyes caused by dehydrated skin. It has been a miracle oil in evening out my skin tone. Rosa Fina is amazing for dry and mature skin and is a perfect for prevention of wrinkles.

Here are the two Rosehip oils I have used and the Akin brand smells better in my opinion but the Akamuti brand is cheaper.

A'kin Pure Radiance Rosehip Oil - Certified Organic 23ml


There are other essential oils that help in the process of scar removal such as Tea Tree Oil and Lavender Oil as they heal wounds, inflamed acne, popped spots quickly for the healing process.

So calm down if you have burnt yourself with a hair tong like I did on my neck with pink flesh exposing like I had a piece of ham stuck on it, as it will completely heal by using these oils and mine did.

Good luck Hunnies!

Written by Similicous!


Tuesday, 8 May 2012

Oily Skin care routine that actually works!!!!

For a long long time I have been trying to manage my oily skin, i  have tried an endless amount of products ranging from £ to ££££. I have spent many hours researching what i can do from home made masks, bases, gels, everything  to no avail.

Until last week I devised myself a skin care routine only for my pores as i had found a few things that worked so decided to mix them together as a little routine for two weeks. Not only are my pores disappearing before my eyes, my skin is less oily, tone is more even, white heads are vanishing and blackheads which i use to get every week and wouldnt go for months are not only going but new ones are not appearing. This routine works for me and i dont think ill be quitting it any time soon.

Now before this my skin use to get oily within 30 minutes of makeup, and look like an oil slick by th end of the day. It was disgusting, made me feel horrible and icky, and it made me break out majorly. Now my skin does not get oily, but has a more comfortable moisturised sheen that looks good, and it doesnt get like an oil slick even if i have been at uni 10 hours!!! Now thats what i call an improvement!!!

But i should mention whilst ive been doing this i have increased my water uptake by about 4 glasses, but its only 8 glasses a day so your average really.

Anyway pasted below is my skin care routine; i will go through the individual products after.

  AM: Cleanse with organic surge facial wash, tone with lemon and rosemary essential oil water, moisturise with aloe vera and nelsons moisturiser

  PM: cleanse with organic surge facial wash, tone with witch hazel, moisture with nelsons and use face oil mix

Every Sunday :Steam, do kaolin mask, do fullers earth mask, magnesium carbonate, tone with witch hazel do weekly peel, cleanse, tone with lemon and rosemary, moisturise with nelsons and at night use face oil mix

Organic Surge facial wash:
a couple years ago i had the worst acne breakout of my life. FACE = SMALL POCKS .... seriously... i blame the exam  + period = not good! 

anway i switched to this facewash, its just brilll.. i think ive done a review on it ,... anyway its good for all skin types not particularly oily,, but it does me good! oily skin can get dehydrated wich exaberrates the sebaceous glands, so dont over do it with the anti - oil products. I wouldnt call it cheap , but it lasts me ages, 1 squirt of this goes a long way!!!
I usually buy mine from amazon as they have good deals.


Lemon and Rosemary water
This is a creation of my own making, i kinda just mixed it up because i knew lemon was good for oily/congested skin types and so was rosemary. i think this is the main miracle for my routine. It makes me feel refreshed, clean, and i know its working under my moisturiser throughout the day against bacteria, and oil. Got to love it!

Recipe: mix 5- 7 drops of each essential oil in 200 ml of water and 50ml of glycerin. Put in a bottle, preferably a dark one to protect from uv light. Shake before each use, dab on cotton wool, swipe gently over face.

I bought the essential oils from http://enaissance.co.uk/  Its a great website with lots of natural stuff for good prices. They also do 3 for 4 deal on essential and carrier oils  so its SUPER!
Glycerine, VegetableLemon, Cold PressedRosemary

Aloe Vera

i mix this with my mosituriser as it kind of acts like a natural primer under makeup and without makeup too. It attracts water molecules to hydrate and plump the skin up and ready it for any moisture. its anti-bacterial and anti-inflammatory action helps fight against any spots that might be forming in you skin without you knowing!!!  Also helps keep me oil free for longer.

I buy mine from holland and barrets when they have a penny sale on so i buy 1 and get 1 for a penny. Not to shabby!  Anyway theyre about 200ml for £5.99 originally, but in the sale i get 2 for £6. It tends to last about 2-3 months so its not bad.
Product Image For <br />Aloe Vera Gel

Nelsons mosituriser

I buy this form holland and barretts too. Im using this mosituriser right now as you get alot  in the bottle, and you only need a tiny squirt. Its a 125ml bottle for £8.39.  IT Might be alot , but ive looked around theres nothing better at this price. It doesnt make me oily, ok at moisturising, but it doesnt break me out, so thats good enough for me. I have tried a better one but it has its cons, ill emntion it below anyway.  But nelsons pure and balacning moisturiser will do for now.


Lavera young faces organic mint moisturiser

this is what big green smile.com had to say where i bought it from;
Moisturises your skin, reduces skin impurities and enables swifter recovery from inflammation. Antibacterial essences of peppermint, sage and rosemary, combined with zinc lactate in a special recipe to encourage normalisation of the skin.
Mild fruit acids regulate tallow production, giving a fine and smooth complexion. This antiseptic moisturising gel contains precious sage and rosemary water to give your skin silky smoothness.

i must agree, this is by far the best moisturiser ive ever had, it mositurises the perferct amount, keeping the balance between moistur and hydration. But it comes at  a price, its essentially the same as nelsons, but you have to use alot of this moisturiser and its a small bottle too. price £8.80 for 30ml

Witch Hazel

Now i use witch hazel along with my rosemary and lemon toner because this is more of a lceansing toner ,wehereas the lemon and rose is more of a protective, hydrating toner.
Witch hazel is another critical ingredient in my routine, since you can see the difference with this straight away. Skin looks so clean after this its amazing, it has an astringent effec allowing it to clean and tighten pores. Nothing can shrink pores, but you can minimze the look of them, and this does exactly that. It prevents balckheads and cleanses deep down.

I brought mine from http://enaissance.co.uk/. They  do different size bottles at a range of prices. generally the bigger the bottle the better value for money. I bought 500ml for £7.76 .. its really worth the price.
Witch Hazel
The powders for the face masks you can buy at http://www.ferobeauty.com/ They do good prices on facial powders, makeup brushes , and acessories. i bought a range of facial powders about 2-3 years ago, under £30 and ive still got alot to go!